How to create an HTTPS server in localhost?

- Published on
- /6 mins read/---
When do we need HTTPS in local?
Problem
In most cases, we don't need HTTPS while developing app in local. However, if your app has features that require authentication with a third parties, or listen to webhooks from another app... And those third parties require your app must adopt HTTPS in order to receive their request, then how would you do?
Of course, it will be HTTPS in production, but how to have a secure connection while developing your app locally?
We have several options like using PageKite or ngrok to create an HTTPS tunnel that points to your localhost, but these services have a few drawbacks:
Limited number of tunnels/requests to use at a time on free plan.
Unable to use a specific domain, it will be different and we have to re-config the app's environment variable every time developing the app.
And they're
freakingslowww which wastes lots of time developing/testing our app.
If you're facing similar issues, here is the solution
Solution
The solution here is to use OpenSSL to generate SSL certificates and create an HTTPS server with those certificates.
Generate Root SSL Certificate
First, we need to create a Root SSL Certificate to sign any certificate that we will use for localhost.
Use the following command to create a key to generate Root SSL Certificate in the next step:
openssl genrsa -des3 -out rootCA.key 2048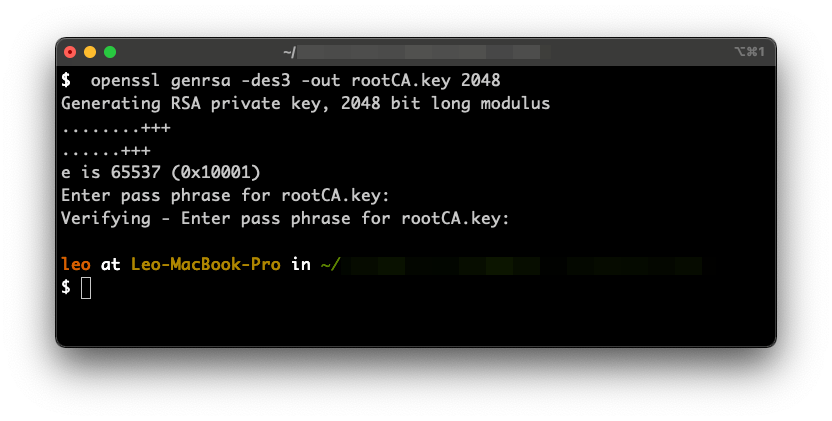
You will be asked to enter a pass phrase to generate the key, just enter a random string and verify it.
Remember this pass phrase as you will need it in the next steps!
The generated key will be saved in rootCA.key file, use it to generate Root SSL Certificate with the following command:
openssl req -x509 -new -nodes -key rootCA.key -sha256 -days 7300 -out rootCA.pem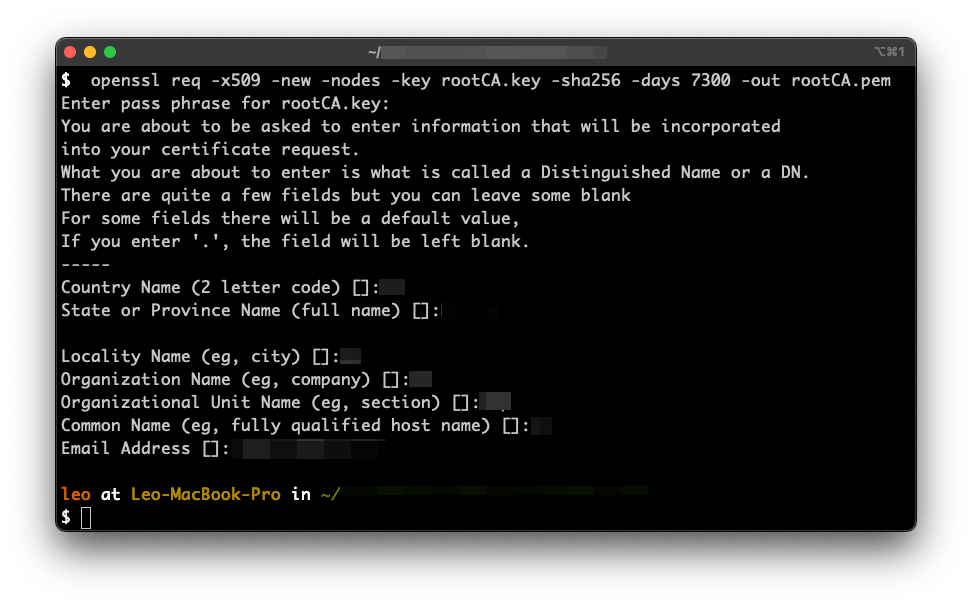
Fill in the required information (the pass phrase must match the one that was used to generate the rootCA.key in the first step!)
This certificate will be saved in rootCA.pem file.
Trust the Root SSL Certificate
To use the certificates generated by the Root SSL Certificate we need to tell the Operating System to trust the Root Certificate.
Open the Keychain Access app (MacOS), select Certificate tab:
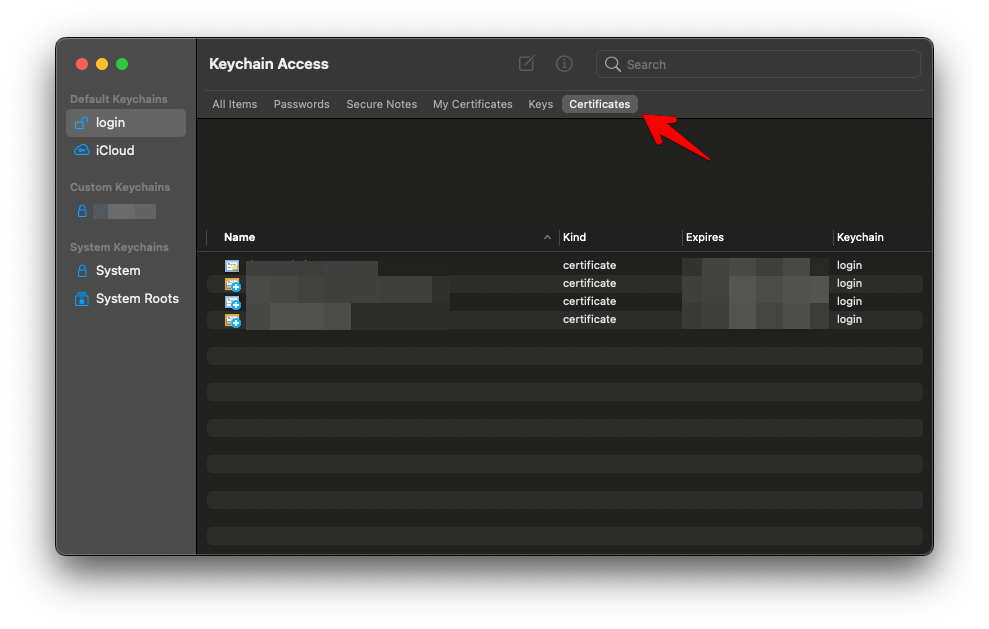
Import rootCA.pem by dragging in or navigating to File / Import items....
Then Right click / Get Info (or Double click) on the imported certificate
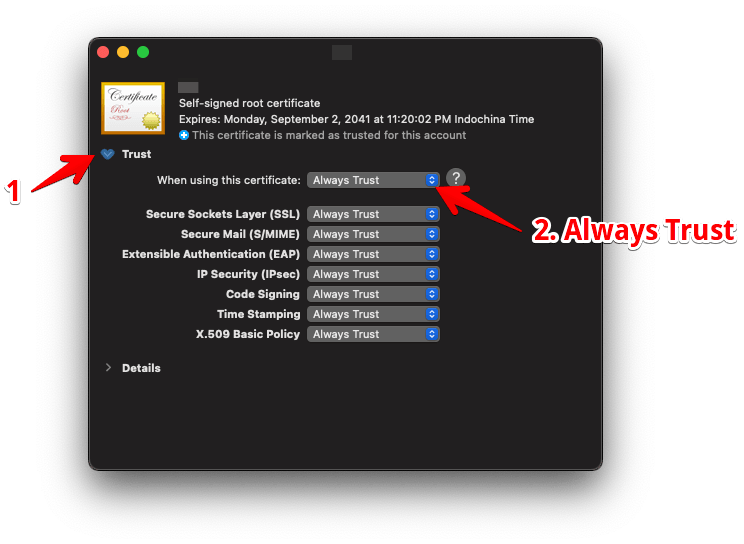
Expand the Trust tab, select Always Trust in the first setting, then save it.
The Keychain Access will then show a message like "This certificate is marked as trusted for this account" which means you have successfully trusted the Root SSL Certificate .
Create local SSL Certificate
Now, we will use the trusted Root SSL Certificate to generate an SSL Certificate to use in localhost.
Step 1
Create a config file named server.csr.cnf with the following cotent. OpenSSL will use this file to generate the Certificate key:
[req]
default_bits = 2048
prompt = no
default_md = sha256
distinguished_name = dn

[dn]
C=US
ST=RandomState
L=RandomCity
O=RandomOrganization
OU=RandomOrganizationUnit
emailAddress=hello@example.com
CN = localhost
Create a Certificate key with the above configs and save it to the server.key file:
openssl req -new -sha256 -nodes -out server.csr -newkey rsa:2048 -keyout server.key -config <( cat server.csr.cnf )
Step 2
Create a v3.ext file with the configurations below to generate the certificate:
authorityKeyIdentifier=keyid,issuer
basicConstraints=CA:FALSE
keyUsage = digitalSignature, nonRepudiation, keyEncipherment, dataEncipherment
subjectAltName = @alt_names

[alt_names]
DNS.1 = localhost
Generate certificate with Root SSL Certificate and v3.ext config file then save to server.crt with this command:
openssl x509 -req -in server.csr -CA rootCA.pem -CAkey rootCA.key -CAcreateserial -out server.crt -days 825 -sha256 -extfile v3.extRemember to use the same pass phrase in the steps above!

Done
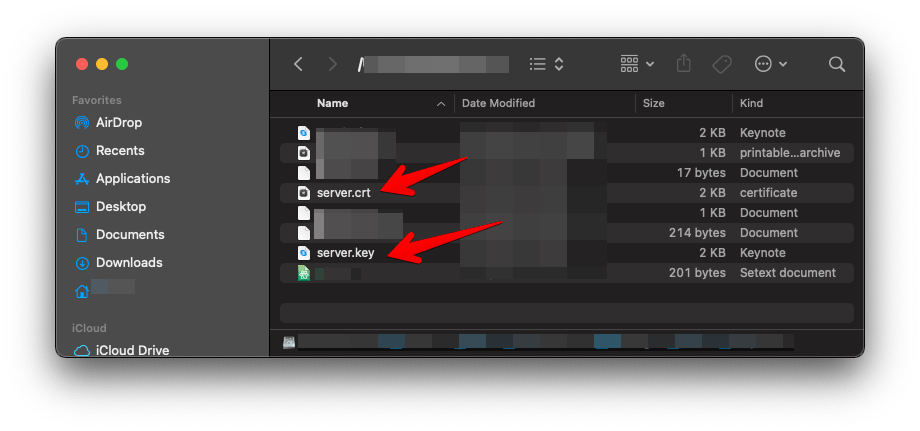
Now in the folder where you just created certificate will contain 2 files: server.key and server.crt. We will use these files to create an HTTPS server in the next step.
Create HTTPS server
The most important work of generating server.key and server.crt is done, now let's use that certificate to create a Nodejs HTTPS server in localhost using Koa.js (It's almost the same in Express cause Koa is created by the team behind Express ).
Create a simple web server with Koa:
let Koa = require('koa');
let app = new Koa();

app.use(async ctx => {
  ctx.body = 'Hello World';
});

module.exports = app
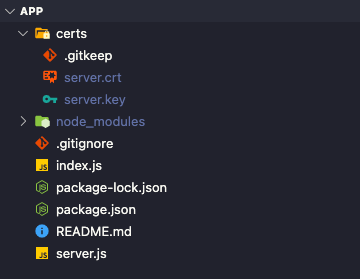
Create a directory called certs/ in your app, then move server.key and server.crt there.
Load the certificate files and create HTTPS server with https module:
let app = require('./server')
let https = require('https')
let fs = require('fs')
let path = require('path')

let certOptions = null
try {
  certOptions = {
    key: fs.readFileSync(path.resolve('certs/server.key')),
    cert: fs.readFileSync(path.resolve('certs/server.crt'))
  }
} catch(err) {
  console.log('No certificate files found!')
}

let host = process.env.APP_URL || 'localhost'
let isLocal = host === 'localhost'
let enableHTTPSInLocal = Boolean(isLocal && certOptions)

let port = enableHTTPSInLocal ? 443 : process.env.PORT || 3434
let protocol = (isLocal && !certOptions) ? "http" : "https"

let url = `${protocol}://${host}${isLocal ? `:${port}` : ''}`

let callback = () => {
  console.log(`App start successfully at ${url}`)
}

if (enableHTTPSInLocal) {
  https
    .createServer(certOptions || {}, app.callback())
    .listen(port, callback)
} else {
  app.listen(port, callback)
}
The project structure should looks like this:
Start your app with npm start ( Notice that it's node index.js, not node server.js!)
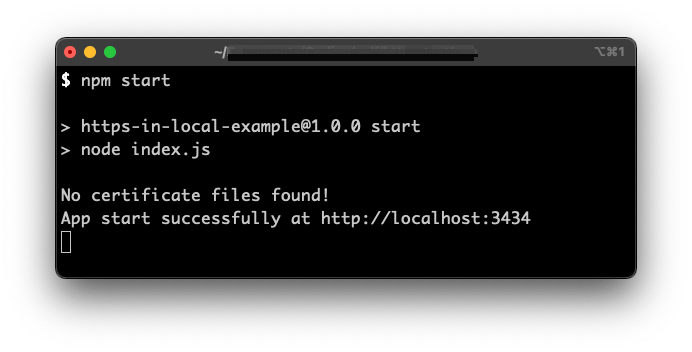
If no certificate file exists, the app will start at normal http.
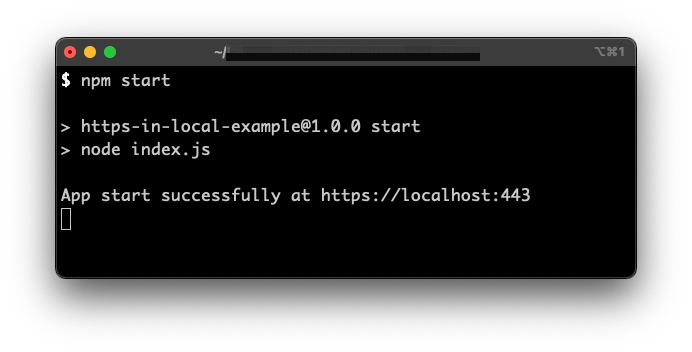
And after moving the certificate files in, the app will start with https on port 443.
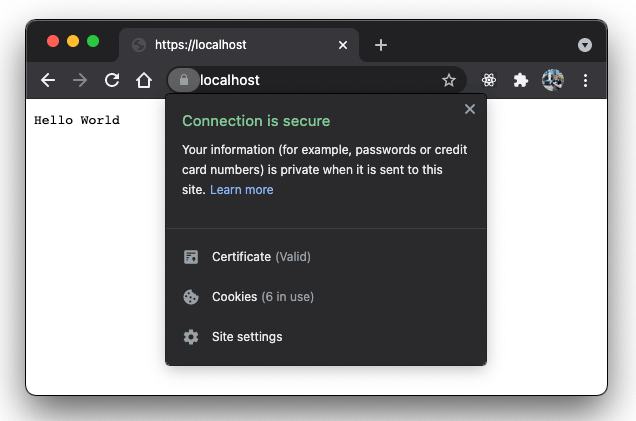
Open https://localhost:443 in your browser and you will see your app running with HTTPS
The source code can be found in this repo.
Conclusion
If you're not a Node.js developer, then you can google how to create an HTTPS server with certificate files in your preferred technology
I hope this guide can help you while developing your app with HTTPS locally!
Happy sharing
